How to Hang Curtains Like an Interior Designer
Properly hung curtains can enhance the overall aesthetic of a room, making it look more polished and sophisticated. Effective window treatment is a crucial aspect of interior design, as it can greatly impact the ambiance and functionality of a space.
With the right curtain hanging tips, you can create a beautiful and inviting atmosphere in your home. In this article, we will guide you through 5 simple steps to hang curtains like a pro, enhancing your home decor and transforming your living space.
Key Takeaways
- Understand the importance of proper curtain hanging
- Learn the 5 simple steps to hang curtains like an interior designer
- Discover how to enhance your home decor with effective window treatment
- Get tips on creating a beautiful and inviting atmosphere
- Transform your living space with professional-looking curtains
The Impact of Properly Hung Curtains on Your Space
The impact of well-hung curtains on a room’s overall aesthetic cannot be overstated. Curtains play a crucial role in enhancing the visual appeal of a space, and when done correctly, they can elevate the entire ambiance of a room.
How Curtains Transform a Room’s Aesthetics
Curtains have the power to completely transform a room’s aesthetics. They can add color, texture, and pattern, making a space feel more inviting and cozy. By choosing the right curtains and hanging them properly, you can create a warm and welcoming atmosphere that reflects your personal style.
Moreover, curtains can help to balance the proportions of a room, making it feel more harmonious and visually appealing. For instance, long curtains can make a room feel taller, while wide curtains can make it feel more spacious.
Common Curtain Hanging Mistakes to Avoid
Despite their potential, curtains can also be a source of frustration if not hung correctly. There are several common curtain hanging mistakes that can detract from a room’s aesthetics.
Hanging Curtains Too Low
One of the most common mistakes is hanging curtains too low. This can make a room feel smaller and less elegant. To avoid this, it’s essential to hang curtains as close to the ceiling as possible, creating the illusion of height and making the room feel more spacious.
Choosing Inadequate Width
Another mistake is choosing curtains that are too narrow for the window. This can make the curtains look skimpy and uninviting. To avoid this, ensure that the curtains are at least twice the width of the window, allowing them to fold nicely when open and providing adequate coverage when closed.
By avoiding these common curtain hanging mistakes and following some simple interior design tips, you can enhance your room’s aesthetics and create a beautiful, inviting space.
Essential Tools and Materials for Hanging Curtains
To hang curtains like a pro, you’ll need a set of essential tools. These include:
- Measuring Tools: Accurate measurements are crucial for hanging curtains correctly.
- Drilling and Mounting Equipment: A drill and appropriate mounting hardware are necessary for securing curtain rods.
Selecting the Right Hardware for Your Curtain Type
The type of curtain you’re hanging dictates the kind of hardware you’ll need. Consider the weight, material, and style of your curtains when choosing your hardware.
Rod Styles and Finishes
Curtain rods come in various styles and finishes. Choose a rod that complements your curtain style and room decor.
Bracket Options and Weight Considerations
Ensure that your curtain rod brackets are sturdy enough to support the weight of your curtains. For heavy curtains, consider using reinforced brackets or additional support.
By selecting the right tools and materials, you’ll be well on your way to hanging curtains like a professional.
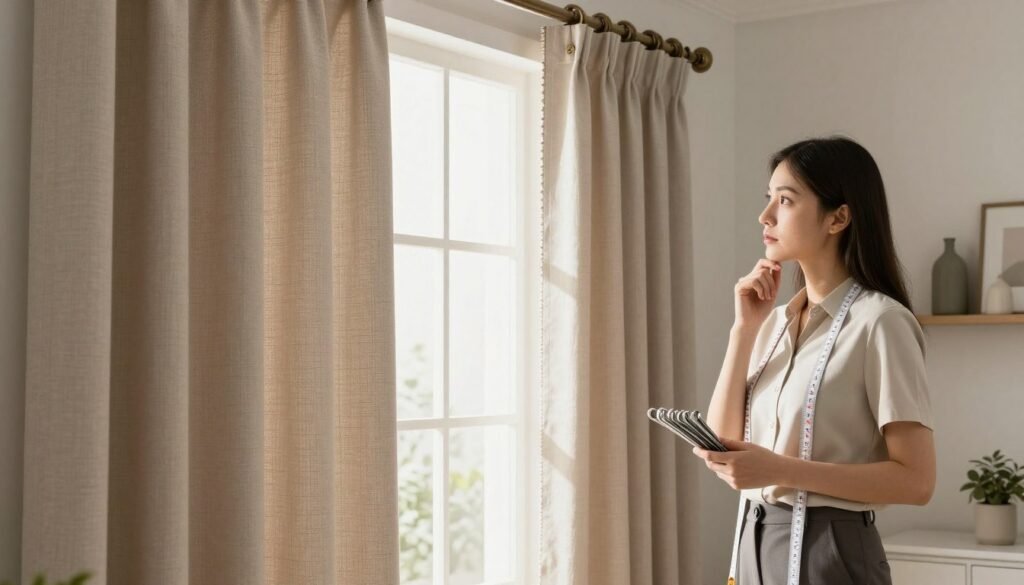
Measuring and Planning: The Designer’s First Step
The first step in hanging curtains like a pro involves meticulous measurement and planning. This foundational step ensures that your curtains not only fit perfectly but also enhance the overall aesthetic of your room.
Taking Accurate Window Measurements
To start, you’ll need to take precise measurements of your window. Measure the width at three different points: the top, middle, and bottom. Use the smallest measurement to ensure your curtains fit properly. For the length, decide whether you want your curtains to be sill-length, apron-length, or floor-length, and measure accordingly.
Determining the Ideal Curtain Length and Width
When it comes to curtain length, the style you choose can significantly impact the room’s appearance.
Floor-Length vs. Sill-Length Curtains
Floor-length curtains create a dramatic, elegant look and are ideal for formal spaces. Sill-length curtains, on the other hand, are more practical for areas around radiators or where a more casual ambiance is desired.
Calculating Proper Fullness
To achieve the perfect fullness, multiply the width of your window by 2 or 2.5. This calculation ensures your curtains have a luxurious fold when closed.
Deciding on Curtain Height Placement
The height at which you hang your curtains can dramatically affect the perception of your ceiling height and the overall feel of the room.
The “High and Wide” Designer Rule
Following the “high and wide” rule, hang your curtains as close to the ceiling as possible and extend them beyond the window frame. This technique creates an illusion of higher ceilings and wider windows, making your space feel more expansive and grand.
Hanging curtains correctly is important, but getting the overall decor right matters just as much, especially if you want the space to feel well put together in the long run. For detailed decor ideas, like an interior designer,r you can check this blog for a complete guide:11 Home Decor Choices Professional Interior Designers.
By carefully measuring and planning, you set the stage for beautifully hung curtains that can transform the look and feel of your room.
How to Hang Curtains Like an Interior Designer: The 5-Step Process
Transform your space by learning how to hang curtains like an interior designer, using our straightforward 5-step guide. Hanging curtains is not just about blocking light or ensuring privacy; it’s an art that can significantly enhance the aesthetic appeal of your rooms.
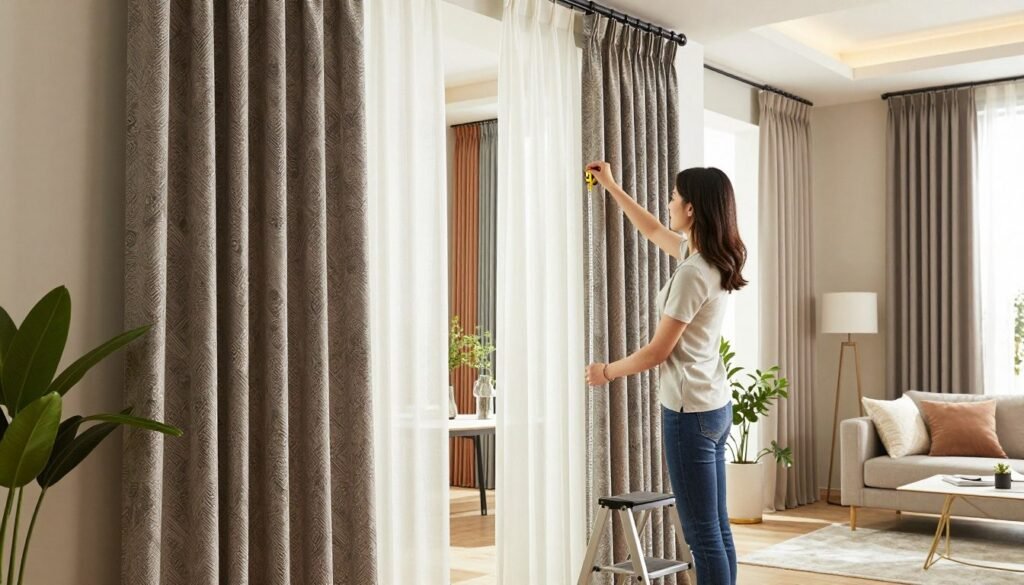
Step 1: Mark Your Bracket Positions
The first step in hanging your curtains is to accurately mark where your curtain rod brackets will be placed. This step is crucial for achieving a balanced and symmetrical look.
Using a Level for Perfect Alignment
To ensure your brackets are perfectly aligned, use a level. This tool will help you avoid any tilting or unevenness that could mar the appearance of your curtains.
Designer Placement Tricks
Interior designers often use tricks like placing brackets slightly higher than the window frame to create the illusion of taller windows. Consider the style and height of your curtains when deciding on bracket placement.
Step 2: Install the Curtain Rod Brackets
Once you’ve marked the positions for your brackets, it’s time to install them. The method of installation can vary depending on the type of wall you have.
Securing to Different Wall Types
For drywall, use wall anchors to provide a secure hold. For concrete or brick walls, consider using masonry bits and appropriate anchors.
Working with Wall Anchors
Wall anchors are essential for providing the necessary support, especially for heavy curtains. Choose anchors that are suitable for the weight and type of your curtains.
Step 3: Prepare Your Curtains
Before hanging your curtains, prepare them by steaming or pressing to remove any wrinkles. This step ensures your curtains hang smoothly and look their best.
Steaming and Pressing Techniques
Use a steamer for delicate fabrics or a hot iron for thicker materials. Always check the care label to determine the best method for your curtains.
Attaching Curtain Rings or Hooks
If your curtain rod requires rings or hooks, now is the time to attach them. Make sure they are evenly spaced for a uniform appearance.
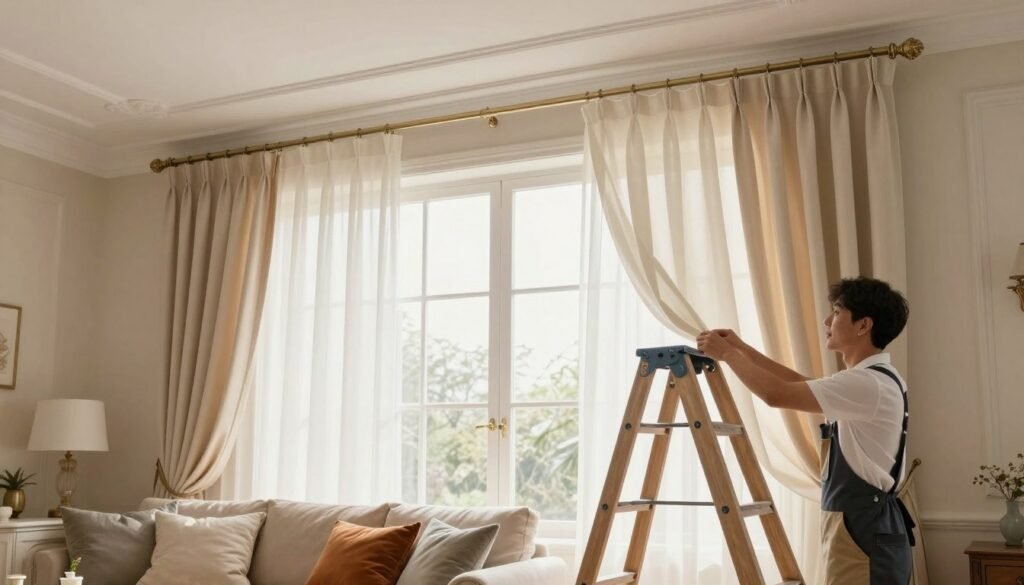
Step 4: Hang the Curtain Rod
With your brackets installed and curtains prepared, it’s time to hang the curtain rod. Ensure it’s securely placed on the brackets.
Balancing the Rod Weight
For heavier rods or longer spans, consider using a center support to prevent sagging.
Securing Finials and End Caps
Finials and end caps not only add a decorative touch but also help secure the rod in place. Choose designs that complement your room’s decor.
Step 5: Style Your Curtains Like a Pro
The final step is to style your curtains. This involves creating the perfect folds and arranging them for optimal light control.
Creating Perfect Pleats and Folds
Use a pinch pleat or pencil pleat to create a professional look. You can use curtain hooks or rings to achieve the desired folds.
Arranging for Optimal Light Control
Adjust your curtains to control the amount of light entering the room. Consider layering curtains for enhanced flexibility.
By following these 5 steps, you can hang curtains like an interior designer, enhancing the beauty and functionality of your windows.
Designer Secrets for Different Window Types
To elevate your space, it’s crucial to apply designer secrets tailored to your window type. Different windows present unique challenges and opportunities for styling. Understanding these differences is key to achieving a polished, professional look.
Solutions for Large Windows
Large windows can be a stunning focal point in a room, but they often require special consideration. To make the most of these expansive windows, consider using long, flowing curtains that can reach the floor or even pool slightly. This creates a dramatic effect and can make the ceiling appear higher. For very large windows, you might also consider using multiple curtain panels or a combination of different window treatments, such as layered curtains and shades.
Approaches for Small or Awkward Windows
Small or awkwardly shaped windows can be more challenging, but there are effective strategies for enhancing them. For small windows, using light-colored, sheer curtains can help make the window appear larger by allowing more light in. For awkward shapes, such as arched or angled windows, custom-made curtains or specially designed hardware can provide a tailored fit that complements the window’s unique shape.
Bay Window Curtain Hanging Techniques
Bay windows offer a unique opportunity for creative window treatment solutions. One effective approach is to use a combination of curtain rods that follow the contours of the bay. This might involve a central rod with additional rods on either side, angled to match the bay’s configuration. Using individual panels for each section of the bay can also help to create a cohesive, tailored look.
Corner Window Strategies
Corner windows, where two windows meet at a 90-degree angle, require a thoughtful approach to create a seamless look. One strategy is to use a continuous curtain rod that wraps around the corner, providing a unified appearance. Alternatively, using two separate rods that are closely aligned can also work well, especially if the curtains are designed to be stationary or to slide easily along the rod.
| Window Type | Curtain Style | Hardware Recommendation |
| Large Windows | Long, flowing curtains | Sturdy, decorative rods |
| Small/Awkward Windows | Light-colored, sheer curtains | Custom or tension rods |
| Bay Windows | Multi-panel curtains | Angled, multi-section rods |
| Corner Windows | Continuous or matched panels | Continuous or closely aligned rods |
Material-Specific Hanging Considerations
When it comes to hanging curtains, the type of material you’re working with can significantly impact the overall look and functionality of your windows. Different materials have unique characteristics that require special consideration when it comes to hanging them.
Hanging Heavy Fabrics Like Velvet and Brocade
Heavy fabrics like velvet and brocade require sturdy hardware to support their weight. Use robust curtain rods and brackets that can bear the load, and consider using drapery pins or hooks specifically designed for heavy curtains. For added stability, you can also use center brackets or additional support brackets.
Working with Sheer and Lightweight Materials
Sheer and lightweight curtains, on the other hand, require a more delicate approach. Use thin, discreet curtain rods that won’t overwhelm the fabric. Consider using tension rods or café rods for a more minimalist look. When handling sheer fabrics, be gentle to avoid creasing or damaging the material.
Special Requirements for Lined Curtains
Lined curtains have additional weight due to the lining, so it’s essential to use sturdy hardware that can support the combined weight of both the curtain and the lining. Ensure that the lining is properly aligned with the curtain fabric to avoid any unevenness or sagging.
Blackout Curtain Installation Tips
Blackout curtains require precise installation to ensure they effectively block out light. Use a level to ensure the curtain rod is straight, and make sure the curtains are long enough to cover the entire window. Consider using blackout curtain linings or specialized blackout curtain rods for optimal light-blocking performance.
| Curtain Material | Hanging Considerations |
| Heavy Fabrics (Velvet, Brocade) | Use sturdy hardware, drapery pins or hooks, and center brackets |
| Sheer and Lightweight Materials | Thin curtain rods, tension rods, café rods, gentle handling |
| Lined Curtains | Sturdy hardware, proper lining alignment |
| Blackout Curtains | Precise installation, level curtain rod, blackout linings or rods |
By considering the specific hanging requirements of your curtain material, you can achieve a professional-looking result that enhances the overall aesthetic and functionality of your windows.
Choosing the Right Curtain Style for Your Space
Curtains are not just functional; they play a significant role in defining the style and feel of your room. With various styles available, choosing the right one can be overwhelming. However, by understanding the different curtain styles and their applications, you can make an informed decision that enhances your space.
Popular Curtain Styles and Their Best Applications
Different curtain styles can dramatically change the look and feel of a room. Here are some popular styles:
Grommet and Rod Pocket Styles
Grommet curtains feature metal rings at the top, creating a modern and sleek look. They are ideal for contemporary homes and work well with heavy fabrics. Rod pocket curtains, on the other hand, have a sewn pocket at the top that slides onto the rod, giving a more traditional appearance.
Pinch Pleat and Ripple Fold Options
Pinch pleat curtains are characterized by folds at the top that are pinched together, creating a classic and elegant look. They are versatile and can be used in both traditional and modern settings. Ripple fold curtains have a continuous wave-like pattern, offering a sophisticated and luxurious appearance.
Matching Curtains to Your Interior Design Theme
The curtain style you choose should complement your room’s interior design theme. For instance, if you have a minimalist decor, simple and unadorned curtains like roller shades or plain panel curtains might be suitable. For a more ornate or traditional decor, consider curtains with intricate patterns or heavy drapery.
Layering Curtains for a Designer Look
Layering curtains can add depth and texture to your windows, creating a designer look. You can layer sheer curtains under heavier drapes for a versatile solution that allows you to control light and privacy. This technique also adds visual interest and can enhance the overall aesthetic of your room.
| Curtain Style | Best Application | Recommended Fabric |
| Grommet | Modern, Contemporary | Heavy fabrics like velvet |
| Rod Pocket | Traditional, Casual | Cotton, Linen |
| Pinch Pleat | Classic, Elegant | Silk, Brocade |
| Ripple Fold | Luxurious, Sophisticated | Heavy drapes, Velvet |
Troubleshooting Common Curtain Hanging Problems
The key to beautifully hung curtains lies in understanding how to resolve the most common hanging problems. Even with careful planning and execution, issues such as uneven curtains, sagging rods, and light gaps can occur.
Dealing with Uneven Curtains
Uneven curtains can significantly affect the overall appearance of a room. To fix this, ensure that your curtain rod is perfectly level during installation. If your curtains are already hung but appear uneven, check the brackets for any signs of tilting or if the rod is properly seated. Adjusting the brackets or re-seating the rod can often resolve the issue.
Solutions for Sagging Curtain Rods
Sagging curtain rods are often a result of inadequate support or excessive weight. To prevent or fix this, use sturdy brackets that can support the weight of your curtains. For heavy fabrics, consider adding a center bracket for extra support. This distributes the weight more evenly and prevents the rod from sagging.
Fixing Curtains That Don’t Close Properly
Curtains that don’t close properly can be due to a variety of reasons, including misaligned brackets or overly thick curtains. Ensure that your brackets are aligned correctly and that your curtains are not too heavy for the rod. Using curtain gliders or rollers can also help in smooth operation.
Addressing Light Gaps and Privacy Issues
Light gaps around the edges of curtains can compromise privacy and let in unwanted light. To address this, consider using blackout linings or thicker, heavier curtains that fit snugly against the window frame. Ensuring that the curtains are the correct size for the window and that they are properly aligned with the rod can also minimize light gaps.
By addressing these common curtain hanging problems, you can enhance the functionality and aesthetic appeal of your windows, contributing to a more comfortable and inviting living space.
Conclusion
Hanging curtains like an interior designer is a skill that can be mastered with the right tools, measurements, and techniques. By following the 5 simple steps outlined in this article, you can enhance your home decor and transform the ambiance of any room.
Effective curtain hanging tips can make a significant difference in your interior design. Properly hung curtains can add a touch of elegance, control light, and provide privacy. Whether you’re working with large windows, small spaces, or unique window types, the right curtain hanging strategies can elevate your space.
By applying the principles of interior design and incorporating curtain hanging tips into your home decor, you can create a more inviting and stylish living environment. Experiment with different curtain styles, materials, and hanging techniques to find the perfect look for your home.
FAQs
1- What are the most common mistakes people make when hanging curtains?
Some common mistakes include hanging curtains too low, choosing inadequate width, and not considering the weight and material of the curtains. To avoid these mistakes, it’s essential to measure carefully and choose the right hardware for your curtain type.
2- How do I determine the ideal curtain length and width for my windows?
To determine the ideal curtain length, consider the style you’re aiming for, such as floor-length or sill-length. For width, calculate the proper fullness by multiplying the width of your window by 2 or 3, depending on the desired level of fullness.
3- What are the essential tools and materials needed to hang curtains like a professional?
You’ll need measuring tools, drilling and mounting equipment, and the right hardware for your curtain type, including rod styles and finishes, and bracket options that can support the weight of your curtains.
4- How do I hang curtains on different types of walls, such as drywall or concrete?
To hang curtains on different types of walls, you’ll need to use the right wall anchors and screws. For drywall, use drywall anchors, while for concrete, use concrete screws or anchors.
5- What are some designer secrets for hanging curtains on large or awkward windows?
For large windows, consider using a wider curtain rod or multiple rods to create a more balanced look. For awkward windows, such as bay or corner windows, use specialized curtain hanging techniques, such as using corner brackets or angled rods.
6- How do I style my curtains to achieve a professional, designer look?
To style your curtains like a pro, create perfect pleats and folds, and arrange them to optimize light control. You can also layer curtains or use tiebacks to add depth and visual interest.
7- What are some common curtain hanging problems, and how can I troubleshoot them?
Common problems include uneven curtains, sagging curtain rods, and curtains that don’t close properly. To troubleshoot these issues, adjust the curtain rod or brackets, or use curtain weights or stabilizers to improve the hang and function of your curtains.
8- How do I choose the right curtain style for my space, and what are some popular options?
To choose the right curtain style, consider your interior design theme, the function of the room, and the type of window you’re dealing with. Popular curtain styles include grommet, rod pocket, pinch pleat, and ripple fold options.
9- Can I hang heavy fabrics like velvet or brocade, and what special considerations should I keep in mind?
Yes, you can hang heavy fabrics like velvet or brocade, but you’ll need to use sturdy curtain rods and brackets that can support the weight. Consider using blackout lining or interlining to add stability and reduce wear on the fabric.
Related Blogs
11 Home Decor Choices Professional Interior Designers 100% Regret
Interior designers are usually polite. But get them talking off the clock and you’ll hear strong opinions about certain home decor choices. These are the...
Read more
17 Dark Gray Paint Colors That Designers Turn to for the Perfect Touch of Moodiness
Dark gray has become a go-to color in interior design because it works across many styles and spaces. From warm charcoals to cooler gray tones,...
Read more
Unique Ways to Style a TV In a Small Living Room
Whether you're dealing with a cozy apartment or a compact home, there are numerous ways to elevate your TV's style without overwhelming the space. From...
Read more